Wednesday, December 21, 2011

A Handmade Holiday Gift

I always like to make a few handmade gifts for the holidays. This year I made a laptop cover for my boss. I drew up a Magnolia flower and transferred it to the leather-like fabric. I then machine-stitched the outline in different shades of pink. Sewed two pieces of fabric together to form a "pocket". Velcro tabs are used for the closure. Learn how to make your own here.

Wednesday, December 7, 2011

Wednesday, November 30, 2011

Celebrate the Challah Days!

...with my Happy Challah-days greeting card. You can purchase them at LookLoveSend.com

Perfect for all your friends this season. While you're there, check out my other Holiday and Wedding designs.

Wednesday, November 16, 2011

Thinking (about the) outside of the box

I found this interesting box in my hallway. Hmm, what a great place to store some craft supplies but not looking like that! So, I painted it green, then added some blue for highlights. I distressed it by sanding some areas with a medium sandpaper to expose the wood and original surface which was off-white. I'm really happy with the results.


Monday, November 7, 2011

Fine Wine Tags


I’ve whipped up some free printable wine tags for you, which will be great for wine-and-cheese parties, Thanksgiving dinners and holiday get-togethers.

Most of my family prefers beer, but I like my wine. So, if I’m going to host a holiday party, that’s the beverage of choice. How do I get my family and friends to learn a bit more about this fine drink ? I make it simple and fun with descriptive wine tags.


To make the tags, I researched some of the more popular red and white varietals, jotted down their pronunciations, and added a short general description:
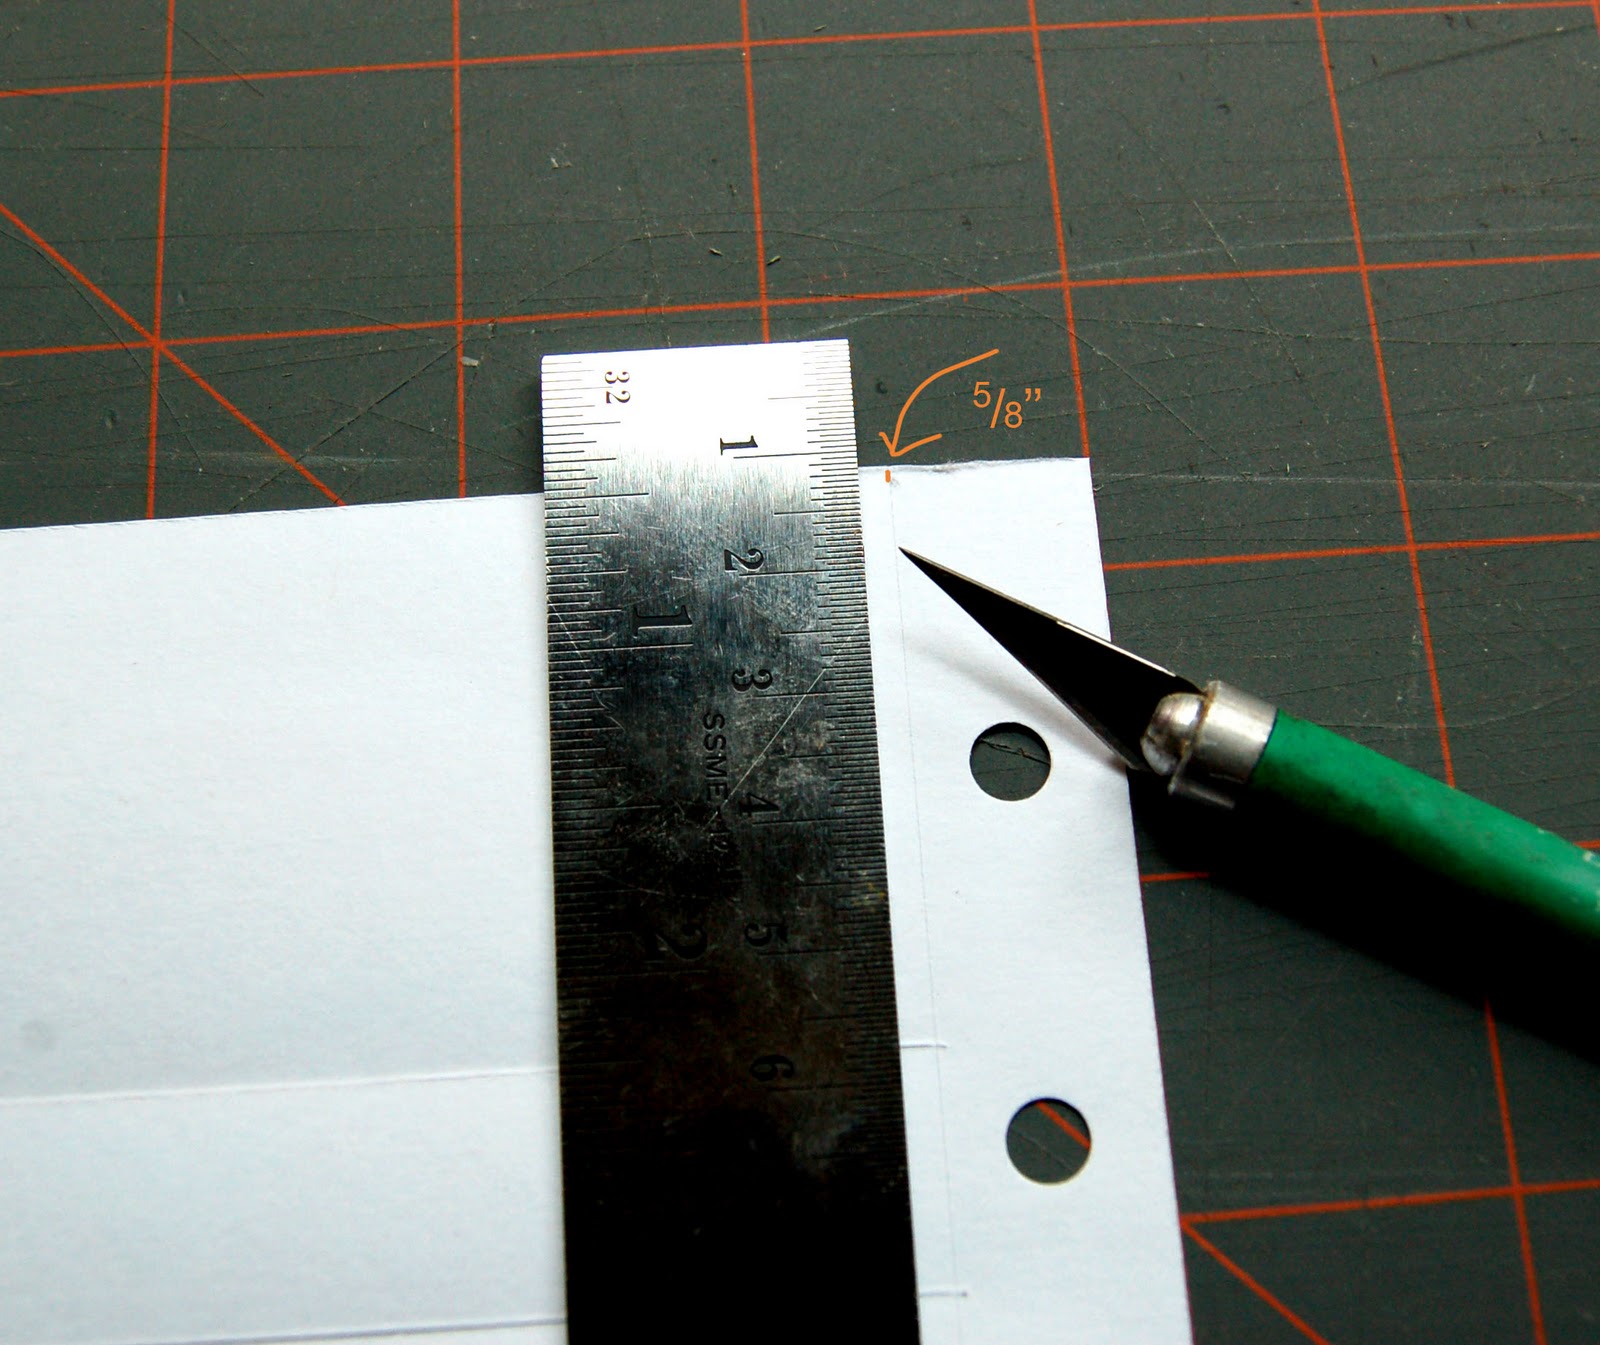
Download the tags (you’ll need Adobe Reader), cut them out, and punch a hole in the top. Then, hang the tags on your wine bottles — use red ribbon for red wine; silver or white ribbon for white. Print extras for all the wine you’ll receive as gifts.


Now, if a guest doesn’t quite know what wine they might like, all they have to do is read the tag and try it … and then try another, and another …
Download your free wine tags here! >>

Wine makes every meal an occasion, every table more elegant, every day more civilized.
- Andre Simon, “Commonsense of Wine”


Monday, October 24, 2011

Mice are Nice

I love making these little chocolate mice for Halloween. It's just melted chocolate, crushed chocolate cookie crumbs and a bit of sour cream to hold it together. Chill for an hour then roll about a tablespoon into ball, coat with more crumbs and then shape into a "mouse". Add some pumpkin seeds for ears, licorice for a tail, red nonpareils for eyes... and you have yourself some nice mice.


Wednesday, October 5, 2011

Halloween Pumpkin Carving Template Book

It’s been a tradition for almost seven years now to carve pumpkins for my friend’s kids. I may not see or talk to my friend as often as I’d like, but every October we have a standing date to create some Halloween fun. I let the kids design the pumpkin and then I carve it.
Since her sons usually have some difficulty coming up with a face idea for their jack-o’-lantern, this year I put together a fun booklet they can flip through to get more than 100 different face ideas. I’d like to share it with you … enjoy!

WHAT YOU NEED:
  • Pumpkin page templates (you’ll need Adobe Reader to open)
  • Cardstock
  • Printer
  • Ruler
  • X-acto knife or scissors
  • Hole punch
  • Ribbon
WHAT YOU DO:
Step 1: Print each page of the pumpkin templates on cardstock. You’ll have 14 individual cards, including front and back cover. (Again, you’ll need Adobe Reader to open)
Step 2: Trim out each card with scissors or an X-acto knife:
Step 3: Starting at black edge, cut each card — excluding the front and back cover — along dotted lines:


 Step 4: Punch three holes along the edge of each card, including the front and back cover:
Step 5: Turn each card over and score lightly with an X-acto blade, 5/8″ from the edge of hole-punched side. (This will help the booklet  flip better.) Be sure to not cut all the way through! Fold flap towards front:


Step 6: Stack all cards together (no particular order is necessary). Thread ribbon through top and bottom holes, as shown:
Step 8: Place ribbon, as shown, and tie a knot or bow:
Step 9: Flip through your booklet, separating each piece to create more than 100 different pumpkin faces!
Step 10: Happy pumpkin carving!


Monday, September 26, 2011

Featured in "Design Sponge at Home"


I'm so excited! The pergola Gene and I built is featured in the Before and After section of Design Sponge at Home. Here's a blurb from The New York TImes:
"The book, Ms. Bonney’s first, has a smart-looking coral cover that promises to pop on the shelf. Its 400 pages are filled with photos, including nearly 200 pages of Sneak Peeks, in which homes — a number belonging to designers — are annotated with tips on how to replicate the look.
There are also D.I.Y. projects and a collection of “before and after” photos that seek to supply what Ms. Bonney thought was missing from previous design books aimed at her peers...


Wednesday, August 24, 2011

Chalkboard Cloth Lunch Bag, Blackboard cloth

Due to overwhelming response, I'm looking to fund this project and make it a reality. Take a look at this fun video I made for more details.

http://www.kickstarter.com/projects/575209219/write-on-lunch-bag

I’ve always loved blackboard paint, so I was thrilled to discover blackboard chalk cloth. Have you heard of it? It’s an easy-to-clean, versatile fabric, and you can use chalk to write on it! So, obviously, I thought it’d be great for a lunch bag for back-to-school (it just makes sense: blackboard, lunch bags, right?) This easy-to-sew bag is a great spot to chalk an important note to your kid, remind them of an upcoming test, let them know what’s for lunch or just tell them how special they are. It easily wipes clean with a damp paper towel. Patent Pending
Here’s how to make it:

WHAT YOU NEED:
  • Scissors
  • Black-board chalk cloth (I got mine at Bell’occhio)
  • Straight pins
  • Pinking shears
  • Sewing machine
  • Velcro sticker
  • Chalk
WHAT YOU DO:
Step 1: Cut two 9 1/2 x 13 pieces of black-board chalk cloth:


Step 2: Pin right sides together and sew 3 sides, leaving a short side open. I cut the “open side” with pinking shears (not shown). Make sure to reinforce the corners by backstitching at the beginning and end of the seam:

Step 3: Pull the bag at its sides so a diamond shape is formed on top. Mark 2 inches from point of diamond to middle of diamond and sew across. Reinforce seams:

Step 4: Cut off the corners about 1/4-inch from seam:

Step 5: Turn the bag right side out. For closure, attach one half of a Velcro sticker to the top portion of one side, roll down and attach the other half to the other side:


Step 6: Write a sweet note to your kids!
Step 7: And just wipe away at the end of the day with a damp cloth:


Monday, August 22, 2011

My Birthday Gift to Myself

I usually treat myself to something nice on my birthday...a massage, a facial, a new pair of shoes. This year I went all out...even though the big "50" is next year. Introducing my brand new, Rosa Red, 2012 Fiat 500! LOVE!
Me and my sales rep, Adam.

Friday, August 12, 2011

Wedding Invitations

I design wedding invitations and more for LookLoveSend.com. Here are some of my designs.
I illustrated these cherry blossoms.

These beautiful red roses were painted by my sister, Dianna Facci.

Here are some vintage lilacs


Tuesday, August 9, 2011

I turned them into a bag!

While rearranging my closet, I came across one of my favorite pair of pants. I put them on … well … they almost fit. I guess working for a bakery has its downfalls! I’ve always loved the color and pattern of these pants, so I couldn’t throw them away or even give them away (they were a bit worn). So, I held on to them for the fabric.


Hmmm … what could I make with them? A couple of throw pillows would be nice, but I have so many. I searched around a bit and found this simple tote bag tutorial – yup, this fabric would be perfect as a bag!

Friday, August 5, 2011

Just Peachy

Click here to see the photos I took of our amazing peach desserts.  Not bad for an amateur photographer...

Tuesday, July 5, 2011

As Seen In...

Fresh Home Magazine's Summer Issue.  


I comment on how to juice up your room with a citrus-inspired palette.


I am also a contributor on FreshHomeblog.com. Visit it sometime!


Tuesday, June 28, 2011

You Name It!

How many times have you been to a BBQ and can’t find the cup you were drinking out of because it looks like everyone else's?

Here’s a solution for you, just in time for the 4th of July: Print these fun vintage-inspired stickers on full-sheet sticker paper, trim and place near the bar. Put out some Sharpies and have everyone fill out a patriotic tag for their drinks. No more mix-ups! 
Happy 4th of July!

Tuesday, June 14, 2011

For the Birds...

I took a woodworking class for my 41st birthday and made this wonderful Adirondack chair. That was, hmm, several years ago, and eventually the wood started to rot. I couldn’t see throwing out all that decent wood, when it still had some life to it and special memories.
Adirondack Chair Before
Adirondack Chair During
So my husband and I made a couple of birdhouses out of it. Now, the chair lives on, and the chickadees and wrens that nest in our other houses have a new home.
Birdhouses After

Friday, June 10, 2011

Garden Variety

Here are some pictures I took of plants that are flowering in my garden right now. Hope you enjoy.